Showing posts with label DIY T-Shirt. Show all posts

Friday, April 10, 2015

DIY Nautical T-Shirt Headband

Here's another headband that looks difficult but really isn't. I have looked for several different tutorials on how to make a nautical knot headband and always got confused by how to actually get the knot right.


In just under 30 minutes, you can make this headband and be ready to head out the door! Below I have created easy to follow, step-by-step instructions for you to create your own.

Let me know what you think!

...


This one can be a bit tricky, so let me know if you have any questions.


Photo credit: Brista Robinson

Saturday, April 4, 2015

DIY Beach Bag

Warmer weather is here and summer will soon follow! Here is a super cute t-shirt bag that you wont have to worry about putting a wet beach towel in.

I used an adult male size medium shirt to make this one. It has enough room for at least two towels and all of my other pool amenities. 


Now, this bag does take a little extra patients to construct, but it is still super easy to make. Below are step by step, easy to follow instructions so that you can make your own. 


Let me know what you think or if you have any questions!


...


Photo credit: Brista Robinson

Friday, March 27, 2015

DIY Crop Top

I was looking back the other day and realized that I hadn't made any real clothes yet. Here's a DIY top that is easy as 1-2-3! I love this one because it is so easy to do, plus it works for just about any shirt. 

This is the perfect project for garage sale finds. I love looking for guys shirts with fun patterns! Let me know what you think!!


...


Photo credits: Brista Robinson

Friday, March 20, 2015

DIY Cat Toy

Showing my cat some love today. His favorite game to play is fetch and I haven't been able to find his favorite toy lately. He's pretty picky and he won't bring any other toys I throw back, except for his shoe.  


If your wondering...it's a doll shoe from a set my mom bought for my son. I don't know why, but my cat claimed it as his. 


Since I can't find his favorite shoe, or its pair, I decided to make him a new one. Unfortunately it didn't work, but maybe your fur baby will like it. 


...


Let me know what you think! 

Photo credit: Brista Robinson

Friday, March 13, 2015

DIY Fringe (No Sew) T-Shirt Bag


With so many shirts and garage sales popping up I decided to make some Eco-friendly bags to take along with me. They take less than an hour to make and are super easy since they require no sewing. In five steps you can be on your way to the book store or beach.


...

Thursday, March 12, 2015

DIY Fringe Halter Top


It’s almost SPRING BREAK!! I may not be going on some tropical get away, but I can feel like it in one of these DIY Fringe Halter Tops. Just in time for the break here are easy instructions to make your own before you leave for vacation. In only about an hour or two you too can have one.

You will need a tank top with a built in bra. To get the best look you will want to have one that has a tag you can remove because you will turn it inside out. I tried this several different ways and realized that if you turn the built in bra inside out the seam will be on the inside for the final product making it look nice and clean.

Let me know what you think!


...

Wednesday, March 11, 2015

DIY Frizz Free T-Towel


Spring is coming up! This means more rain, and for curly hair people like me, more frizz. While I was looking up ways to tame my locks I came across an article on BuzzFeed that suggested using an old t-shirt instead of a towel. Rather than rubbing your hair, gently squeeze and pat dry, never twisting.


Photo Source: michellephan.com 


I decided to try it and loved it. I noticed a difference immediately. I didn't however like using a shirt with the sleeves and a graphic that tugged on my hair. So, I decided to cut one up to make it more efficient and towel like. My hair isn't that long so I also chose to use an old beat up tank top.


...

Saturday, February 28, 2015

Half Braid T-Shirt Scarf

I welcome spring and all its crazy weather! It definitely beats the snow. To get ready for the nicer weather to come wanted to make some new scarves to wear that didn't have to serve a purpose. 


I split a purple tie dye t-shirt between this half braided scarf and a three-braid scarf. This scarf took a little less time than the other at about 30 minutes all together. I used medium sized shirts, but any size will do. The larger and wider your shirt, the longer your scarf will be.

...


Let me know what you think or if you have any questions. If you choose to use two or three different colors play around with the color combination before you commit to braiding. 

Photo Credit: Brista Robinson

Three Braid T-Shirt Scarf


As spring approaches I thought it would be fun to make a few scarfs that don't necessarily need to serve a purpose. If you haven't guessed my favorite color is purple and I happened found this awesome purple tie dye at a thrift store. I knew it would be perfect for some spring scarves.  

The scarf is easy to make and only takes about 45 minutes to create. The shirts I used were size medium, but any size would work. The larger and wider your shirt, the longer your scarf will be. For this project I only used three strands of the tie dye shirt. The rest I used in a half-braid t-shirt scarf


...


Let me know what you think or if you have any questions. If you choose to use two or three different colors play around with the color combination before you commit to braiding. 

Photo Credit: Brista Robinson

Saturday, February 21, 2015

T-Shirt Yarn

Before I start getting too crafty this semester I thought it would be time saving to make up some homemade t-shirt yarn to set aside for future DIY t-shirt projects. By chance I had the back of a t-shirt left over from a previous project (see T-Shirt Canvas) and was wondering what I could do with it. To make t-shirt yarn a shirt with a little more give or stretch left to it will work best.

The amount of time invested in this DIY project from start to finish was about 20-30 minutes. For a full shirt I would image it taking closer to 45-60 minutes, depending on how big it is. 


Supplies Needed

  • T-Shirt
  • Scissors


Getting Started


Start by removing the hems of the shirt at the top and the bottom. Since you probably don't just have the back of a shirt, go ahead and take off the sleeves at the seem and separate the front from the back along the seem, if there is one. 


Measure, and outline if needed, 1 1/2 inch lines in a zig zag pattern. Start the first line at the edge and stop 1-1 1/2 from the edge of the other side. Mark it with a horizontal dash. The second line should start  1-1 1/2 inches from the edge and continue all the way to the other side.


Remember to measure twice and cut once. On one side, cut the lines that start at the edge and stop at the horizontal dashes. 


Turn the shirt around and repeat the process on the other side. When you are finished you will have one long fabric strip. 


Next, start stretching the fabric strip in small sections at a time. The ends will begin to curl in. Be sure not to stretch or pull too hard. When you are finished you have homemade t-shirt yarn! Wrap it up and set it aside for your next project.   


As always, let me know if you have any questions and happy crafting! 


Photos by: Brista RobinsonR

Sunday, February 15, 2015

T-Shirt Cat Tent

Since it was Valentine's Day yesterday my son, Jazz, and I thought we would make something special for out cat, Yuuki. We thought everyone else in the house got one, so why not him. He's a pretty frisky kitty and Jazz thought a cat tent would be absolutely perfect!


From start to finish it took almost an hour to make. We probably would have finished quicker without additional help from Yuuki. Jazz, on the other hand did an excellent job helping take pictures. He didn't actually want to be in any of them because he's missing both front teeth at the moment.

Supplies Needed


  • A Cat
  • T-Shirt (large works best)
  • 2 Wire Hangers
  • Cushion (see T-Shirt Hula Hoop Weaving)
  • Tape
  • Cardboard (size as cushion)
  • Safety Pins
  • Pliers


Getting Started

The Frame


Start by twisting the tops of the hangers and remove the hooks. Straighten out the hangers, you made need to use pliers. I found that newer hangers worked better; you can find them at Walmart for $2.


Begin to shape the frame by bending your hangers in a curved U shape.


Tape the edges of your board and any creases or bends for extra support. Poke holes in all four corners at least 1/2 inch from the edges. I used the discarded hook to make mine.


 Cross your hangers in an X and place the ends in the holes of your board. Secure the middle with tape.


Turn your frame on its side and bend the ends of the hangers flat against the bottom of the board. Secure them with lots of tape.


Now it's time to create the tent!


Pull your shirt over the frame and position the neck hole over the front.


Turn the tent over. Pull the back of the tent fabric taut and pin with safety pins. Fold in the sides and pin to the bottom. You may need to do this several times.


 Turn it over!


Thanks for visiting and I hope your cat loves their tent just as much as Yuuki does.


Photos by: Brista & Jazz Robinson

Friday, February 13, 2015

T-Shirt Canvas: A Last Minute Valentine's Day Gift


If you're any thing like me and your boyfriend is difficult to shop for, this is the perfect last minute gift. What's more perfect than a handmade gift he can't accidentally buy for himself.

From start to finish, this DIY project only took 30 to 45 minutes. I was able to make this in the morning before leaving for class, along with get myself and my seven-year-old son ready for the day. 


Below you will find step by step instructions.


Supplies Needed

  • Cool T-Shirt
  • Canvas
  • Stapler
  • Scissors


When choosing a canvas make sure that it will fit the design and the size of the t-shirt you choose. Smaller shirts and designs will work best on an 8 X 8 inch or 10 X 10 inch canvas. Larger shirts and designs will fit best on a 12 X 12 inch canvas. I chose to use a one inch canvas for more depth, but those tend to be a little more expensive. Either will work fine. You could even recycle an old canvas from a thrift store.

Getting Started


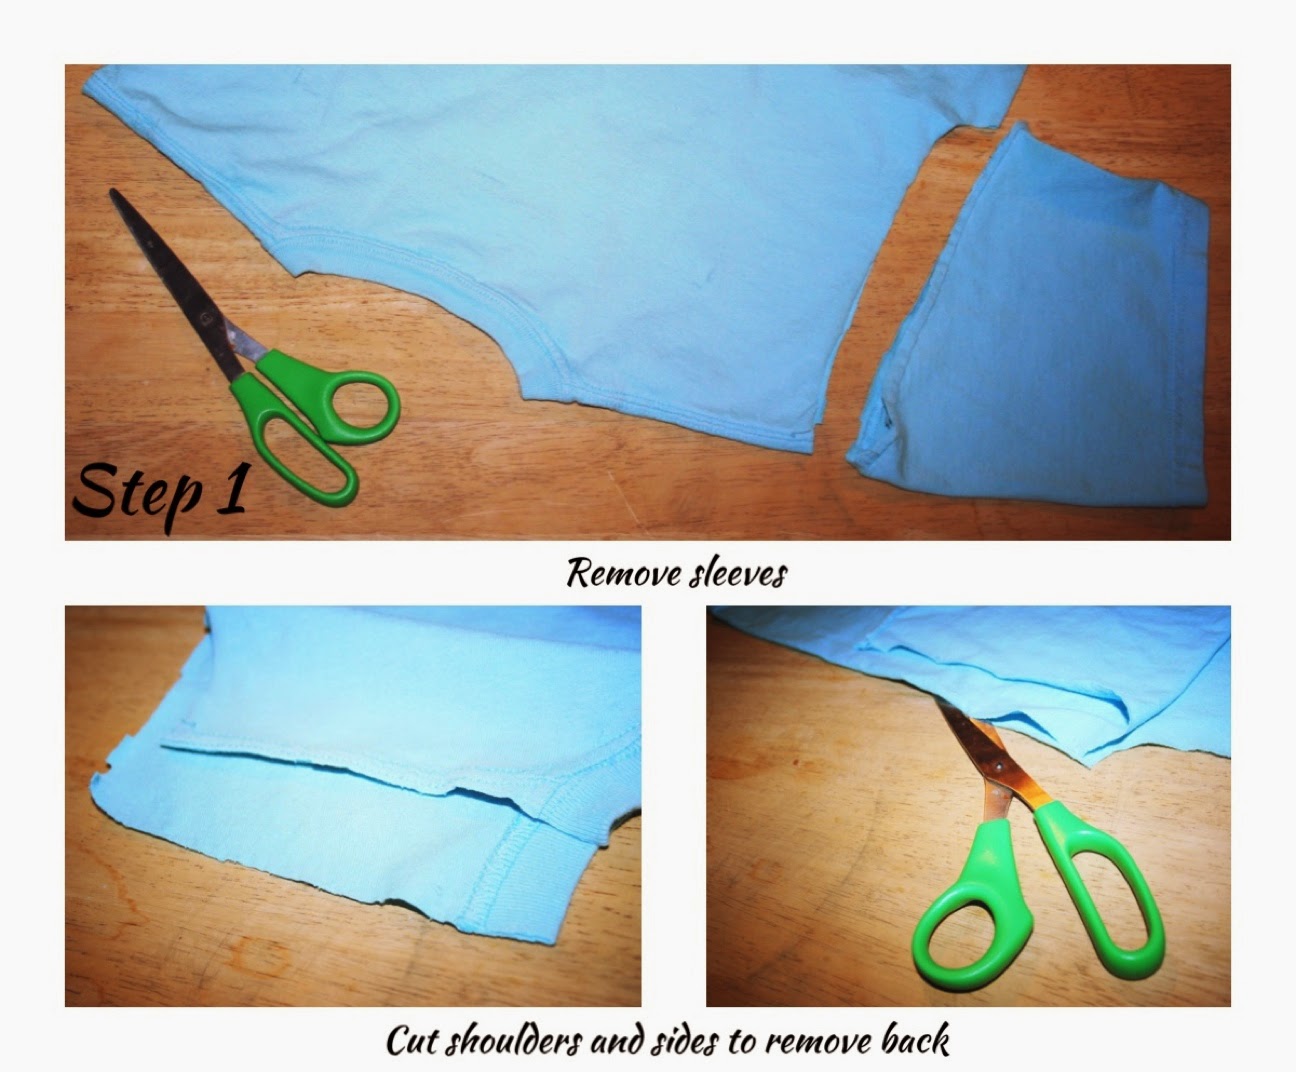
Grab a cool t-shirt out of your boyfriends closet that he doesn't wear or fit into anymore. Begin by cutting off the sleeves along the seem. Next, cut the shoulders along the seem and remove the rest of the back by cutting off the sides. 


Flip your t-shirt over.


Place your shirt over the canvas and align the design where you would like it. 


Holding them together, flip over the canvas and t-shirt. Fold your shirt over the canvas and remove some of the fabric from the bottom. 


Stretch the top of your shirt over the canvas and secure it with staples. 


Then, stretch the bottom of your shirt over the canvas and secure it with staples. Be sure to stretch your shirt very tightly over the canvas. 


Next, fold the corners as if you would a present. Be sure to fold them neatly so that they are not seen from the other side.


Secure the corners with staples, leaving the fabric in the middle.


Stretch the remaining fabric on both sides over the canvas and staple. 


Turn over your canvas and you have now transformed your boyfriends old t-shirt in to a beautiful and meaning full piece of art!


This is project is great for any occasion, and children too! Go ahead and give it a try and let me know what you think.


Photos by: Brista Robinson